Fixing musical instruments
A few years ago I started finding and fixing up old Vega four-string banjos. This led to my being called upon for the repair of a variety of stringed instruments. And I went out on a limb on a couple of my own projects. Fun, amusing, and even, occasionally, successful.
06 Oct 2008
The problem
This picture teaches a lesson: the purpose of a hard case is to protect an instrument; the purpose of a "gig bag" is to keep all the broken pieces in one place.
01 Nov 2008
The repair in progress
I'd dampened the splintered wood and, from inside, pressed it back into place as best I could. Then I made a little patch from mahogany veneer, bigger than the break, and soaked it so that it would bend readily. This was glued in place -- on the inside -- using hide glue (so I could undo it if it didn't work) and held it in place with a five-pound bag of BBs, themselves held in place by powerful rare-earth magnets on the outside of the instrument. I let it sit for a week. Then I sanded it flush.
13 Nov 2008
Staining was problematic
Larrivee, like many guitar makers, uses a two-part, unstrippable finish. It was difficult to arrive at just the right shade of stain, so I made it very weak and applied many coats, letting it dry fully in between. When the color was right, I applied several light coats of semi-gloss lacquer, with steel wool in between, to blend the finish with the awful original stuff.
04 Jun 2009
The raw materials
At left is the original banjolin neck, just for comparison purposes. Next to it is the replacement neck, from a long-neck tenor banjo that had probably gotten converted to five-string. At top is the new calfskin head; below that is the Whyte Laydie pot and next to it the tension hoop. Below them is the dowel stick (it's important that the serial number on it match the serial number of the pot), and, in the bag, hooks, nuts, and other hardware.
04 Jun 2009
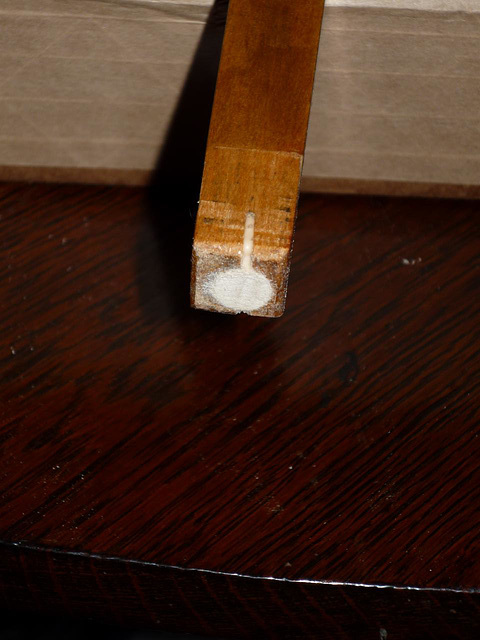
The pot was smaller than the original one on the neck . . .
. . . so the original hole for the dowel stick had to be plugged, then redrilled elsewhere. Here's the plug in place and the location for the new hole marked.
05 Jun 2009
The tailpin had broken in the dowel stick
This instrument put up a fight. The screw that fits in the end of the dowel stick, holding that end to the pot, had broken. So I had to drill down to it, then saw across it so as to make a slot in the end of the broken piece. This let me use a thin screwdriver to unscrew it. Then I could plug the whole hole with a piece of dowel, and fill in the slot with fine sawdust and glue.
05 Jun 2009
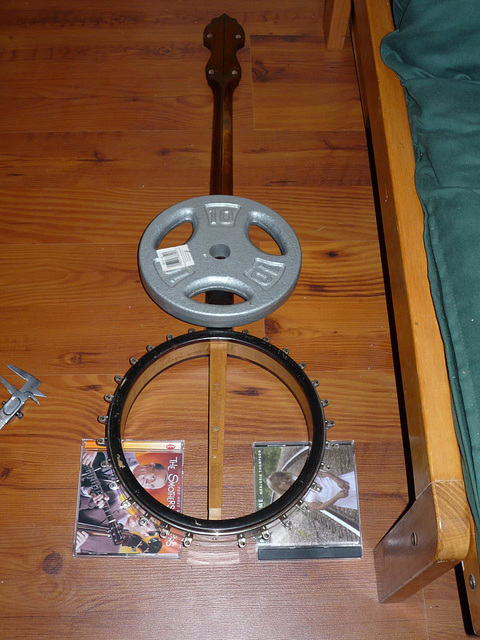
Gluing the dowel stick to the neck
Getting the angles just right is critical. The new hole having been drilled in the replacement neck and dry-fitted, it was time to glue the dowel stick to the neck. This is the makeshift jig I used. Then I let it stay put for 24 hours, and removed the neck and dowel stick from the pot.
06 Jun 2009
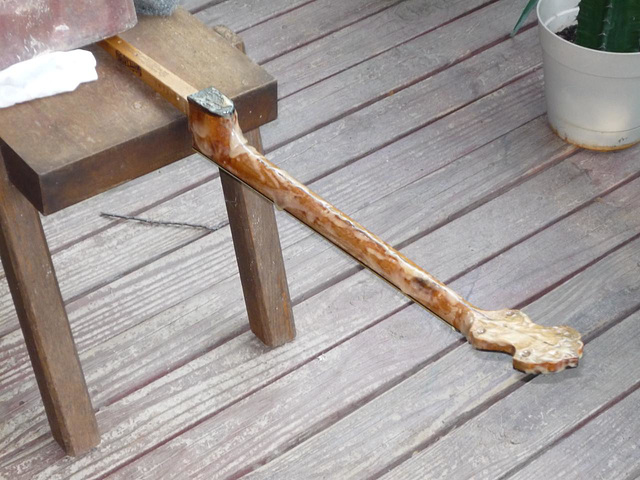
Stripping the neck
The reason to glue up the dowel stick first is now obvious -- the dowel stick makes a good handle.
Jump to top
RSS feed- Latest items - Subscribe to the latest items added to this album
- ipernity © 2007-2024
- Help & Contact
|
Club news
|
About ipernity
|
History |
ipernity Club & Prices |
Guide of good conduct
Donate | Group guidelines | Privacy policy | Terms of use | Statutes | In memoria -
Facebook
Twitter


