See also...
Keywords
Authorizations, license
-
Visible by: Everyone -
All rights reserved
-
135 visits
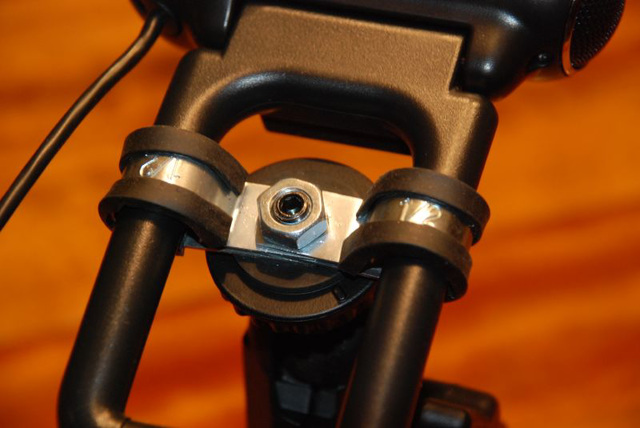
Installed (Closeup)


It took a lot of bending and adjusting to get the holes in the interleaved feet of the P-clamps to line up. Be patient, and carefully adjust the bends in the "tangential" feet, so as to shift the loop a bit and give a little slack to the "bent" feet on the clamps.
I did most of the adjustments with the tangential feet (only) bolted together with a short 1/4-20 bolt-nut pair. Once the bent feet were adjusted enough, their slotted holes started to fit over the free threads on the bolt.
At that point I removed the bolt and nut, and trimmed a 3/8" section of the rubber liner off of the P-clamps (not visible here - it's in the area facing the "outboard" sides of the camera's original mount) to allow the bent feet to reach just a little bit further (with the untouched rubber liner plenty enough to hold the camera tightly).
Having previously removed the head from the suction mount (by opening the clamp on the ball head), I then slipped the feet of the P-clamps over the thread on the head, and (somehow, don't ask me how) managed to get the nut to engage before it all fell apart. On the suction mount's head, there is exactly enough length to go through the nut and leave the rule-of-thumb 1-2 free threads on the other side.
The only thing left to do is to fit in some sort of restraint on the hinge between the camera and its original mount, so that it can't swivel freely there.
View the resulting timelapses here.
- Keyboard shortcuts:
Jump to top
RSS feed- Latest comments - Subscribe to the comment feeds of this photo
- ipernity © 2007-2024
- Help & Contact
|
Club news
|
About ipernity
|
History |
ipernity Club & Prices |
Guide of good conduct
Donate | Group guidelines | Privacy policy | Terms of use | Statutes | In memoria -
Facebook
Twitter

Sign-in to write a comment.