

HaarFager's photos with the keyword: Pinhole Photography
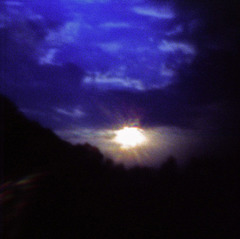
126 Pinhole Test Sunset
| 15 May 2015 |
|
|
|
This is an image I took for a photography class when I was attending college. All I can remember about it is that I used a 126 Kodak 100 ASA film cartridge and that the pinhole didn't turn out to be real round. I was thinking that I converted a Kodak Instamatic X-15 into a pinhole camera, but could never find the actual camera. I either got rid of it for some unknown reason or converted one of the three I have back to normal.
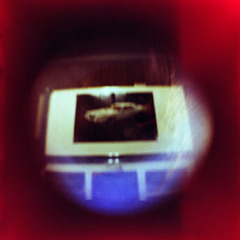
620 Pinhole Experiment, Lincoln Mark V Poster On T…
| 15 Nov 2013 |
|
I found this envelope of 620 negatives and, for the life of me, cannot remember anything about the camera I used to take them. I'm thinking it must have been a homemade one because if I had just converted one of my old Kodak Brownie Hawkeye Flash cameras to a pinhole camera, the images would have been situated on the negatives differently. A Brownie Hawkeye's film transport is vertical, that is, the film is at the top and spools downwardly to the bottom. These negatives are all left to right spooled, so that seems to rule out a Brownie Hawkeye camera conversion. None of my other 620 cameras spool left to right so I'm left in the dark as what I used to take the pictures.
Another clue that it might have been a homemade jobby was that the negatives show a serious light leak at both the top and the bottom of the strips. Also, from looking at the images, it looks like I got the hole too big. The images are all a little blurry and not very focused. Back in 1977 when I shot these, (1977 is most likely indicated), I probably considered the test to have been a failure. Now, they're just semi-interesting curiosities.
Camera: Unknown
Film: Kodak Safety Film 6014, 100 ASA 620 color film
Date: 1977 (?)
Location: Norris City, Illinois, U.S.A.
This picture is the way it looked straight out of the camera. What could I do to it anyway to improve it? It's beyond all help.
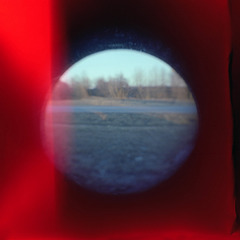
620 Pinhole
| 15 Nov 2013 |
|
|
Another example of a 620 pinhole camera I was testing back in 1977. For some reason, all the negatives exhibit bad light leak problems.
The fact that it resembles a shot taken with a fisheye lens is misleading. What is actually taking place here is I was shooting out my bedroom window through an arch opening out to the front yard and road beyond. The top half of the circle is the edge of the arch. The bottom half of the circle is the shadow created from the arch in addition to which it was a dark, cloudy day and what was in shadow just didn't get much exposure or light.
Another thing I noticed was that, the only 620 cameras I had at the time were Kodak Brownie Hawkeye Flash cameras, which run the negative from above to below, making the images sideways compared to the number strips along each edge. This entire set of negatives featured the images right side up, with the number strips running above and below the image, as if the film travelled left to right. For the life of me, I can't image what I did or what camera I used to get the images to turn out that way.
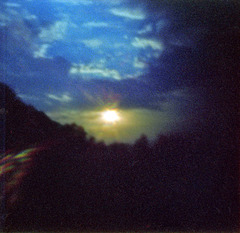
126 Pinhole Camera
| 15 Nov 2013 |
|
|
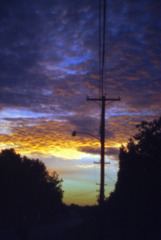
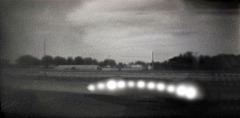
Back in 1979 when I had just started college, my second experimental homemade camera used 126 cartridge film. Unlike my first pinhole camera that used 4x5 inch sized film paper negatives and turned out pretty good, this camera was not a success. The pictures from this one, (this is a sunset in my backyard), had no clarity at all and although you can't tell it in this particular shot, had serious vignetting problems along the right third of the frame.
Camera: Instamatic 126 converted into a pinhole camera
Film: Kodak Safety Film, 100 ASA 126 size
Aperture: ?
Exposure length: 3 seconds
Date: September 1979
Location: Norris City, Illinois, U.S.A.
Pinhole Sony
| 15 Nov 2013 |
|
|
Sunrise at 6:29:54 this morning. I was using my Sony A230 DSLR with a pinhole conversion built into a Konica Minolta Maxxum 5D DSLR body cap.
Camera: Sony Alpha A230
Lens: Konica Minolta Maxxum 5D DSLR body cap with pinhole conversion
ISO: 800
Shutter speed: 1/2 sec.
Exposure program: Manual
Date: September 14th, 2010, 6:29:54 a.m.
Location: Norris City, Illinois, U.S.A.
Pinhole Body Cap
| 15 Nov 2013 |
|
|
|
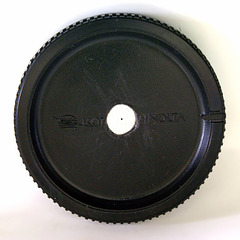
An experimental pinhole attachment I made out of a body cap to one of my digital camera bodies. Doing more research on the internet, I came across a site selling these already made. They claimed that a pinhole/body cap conversion for a Minolta Maxxum such as this was the equivalent of a 45mm focal length. I guess that's why both images I took looked fairly normal.
It also fits Konica Minolta digital cameras such as the KM Maxxum 5D and Sony DSLRs.

Built Ford Tough
| 15 Nov 2013 |
|
|
I've been making pinholes lately with good sharp pins. This one was taken with a Konica Minolta DSLR body cap on a Sony Alpha A230 DSLR body. Evidently, when you use a good, fine-pointed needle, you can get a much more accurate and smaller opening for your pinhole. I redid the pinhole in the body cap and it came out like this - it makes all the difference.
Pinhole House
| 15 Nov 2013 |
|
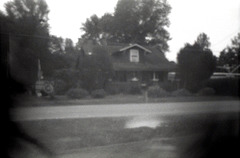
My house, from across the street. Taken as an experiment using a Minolta XD11 converted to be a pinhole camera. This image has not been subjected to any post processing sharpening. But, you could tell that because it's so crappy. It also hasn't been cropped.
Camera: Minolta XD11
Lens: Pinhole taped over lens thread
Film: Kodak Tri-X 400 ISO black and white 35mm film
Exposure length: 5 secs.
Date: September 15th, 2010, 5.33 p.m.
Location: Norris City, Illinois, U.S.A.
Developing specifics (chemicals at 68 degrees):
D-76: 6 3/4 mins. (1:1)
Ilford Ilfostop stop bath: 1 min.
Kodak fixer: 8 mins.
Rinse: 5 mins.
Kodak Photo-Flo 200: 1 min.
Minolta XD11 SLR Pinhole Camera
| 15 Nov 2013 |
|
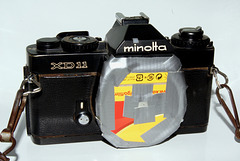
This is my Minolta XD11 SLR converted to be a pinhole camera. I took the pinhole from another camera and placed it on this Minolta and ran a roll of Kodak Tri-X through it, bracketing exposures lenghts to see what would work best for the size of pinhole this was. After developing it and scanning the negatives, I realized that the pinhole was fairly big and didn't render much detail. There were a couple light leaks on the left and right lower corners, but other than that, the theory held up - it could produce pinhole images.
Take 4
| 15 Nov 2013 |
|
|
|
This was my fourth attempt at getting a usuable image with my little homemade Kodak Trix-X film box pinhole camera. Finally, it worked! The frame was the average height of a regular 35mm negative, but the width turned out to be like a panoramic camera. I wasn't sure of the focal length, but the equivelant image I took with a digital camera translated to be 18mm. So, that would lead me to believe this film box camera was 18mm also.
I'm still not certain what is causing the little arc of exposed dots along the bottom of the frame. This glitch also turned up in the last shot I took with this camera, but that one had a different pinhole piece than this one, so it wasn't an imperfection in my pinhole. (Or maybe I recreated the exact same imperfection?) If anybody recognizes this aberration or what causes it, please let me know. I'd really like to be able to correct this and get one really good shot.
Camera: Film Box Pinhole Camera
Lens: Pinhole (approx .051mm)
Film: Kodak Tri-X 400 ISO black and white 35mm film
Exposure length: 2.2 secs.
Date: September 25th, 2010, 15:07:26 p.m.
Location: Fairfield, Illinois, U.S.A.
Developing specifics (chemicals at 68 degrees):
D-76: 7 mins.
Ilford Ilfostop stop bath: 1 min.
Kodak fixer: 8 mins.
Rinse: 5 mins.
Kodak Photo-Flo 200: 1 min.
Film Box Pinhole Camera Loaded
| 15 Nov 2013 |
|
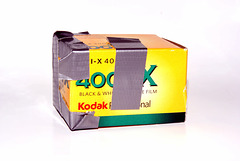
Here is my little pinhole camera I made out of an empty Kodak Tri-X 35mm film box once I had cut a length of unexposed Tri-X film to use in it as a single negative. (In total darkness, of course!) I had cut a special holder out of cardboard from a box of raisins, which was the same thickness as the film box, to hold the negative in place at the back of the camera. I had cut a frame in it so that the area which is normally exposed on 35mm film was approximated. It turned out to be a little wider than a normal 35mm frame, but I figured that wouldn't matter. The piece of duct tape down the top/middle was my "shutter." I doubled the end over at the top so I could pull it lose to start my exposures.
Digital Pinhole Macro Photography Setup
| 15 Nov 2013 |
|
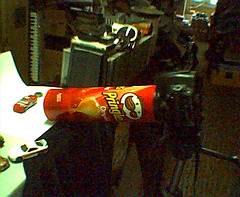
Here is what the setup for the digital pinhole macro photography shot looked like. You can see the Pringles can attached to the front of my Sony Alpha A230 digital slr body and the Matchbox car about three inches from the front of the lens.
Camera used to take this image: $5 Shift 3 Mini Digital Camera (Vivitar Mini Digital clone)
Resolution: .1 megapixels
Lens focal length: f=3.9mm
Exposure setting: Automatic
Aperture: f/2.8
Shutter speeds: 1/60 to 1/1500 sec.
Date: June 28th, 2012, 11.56 a.m.
Location: Norris City, Illinois, U.S.A.
02-004b

Digital Pinhole Macro Photography No. 2
| 15 Nov 2013 |
|
This was my second attempt at capturing a picture with my PringCam 1.0 attached to my Sony Alpha A230 digital slr body. For this shot, I used approximately a 12 minute exposure and 400 ISO. There was a whole lot less grain.
It won't win any photography awards, but I have proven that it's possible to slap a potato chip can over a digital camera body and still get an image.
Jump to top
RSS feed- HaarFager's latest photos with "Pinhole Photography" - Photos
- ipernity © 2007-2026
- Help & Contact
|
Club news
|
About ipernity
|
History |
ipernity Club & Prices |
Guide of good conduct
Donate | Group guidelines | Privacy policy | Terms of use | Statutes | In memoria -
Facebook
X
